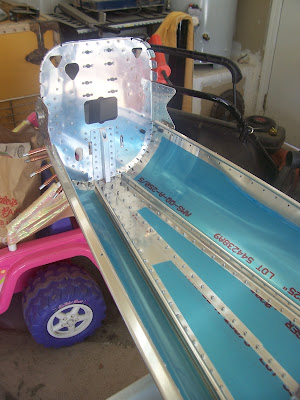
And so there is, when all you're doing is fastening the two bottom skins to the frames. Add the next couple of skins, however, and the ranks start to thin:
So I had to spend a lot of time moving clecos around to optimize spacing and persuade each hole to line up. The holes in the skins are precision-punched at the factory and I resolved that I wasn't going to do any match drilling to make the rivets fit if I could help it. Eventually I managed to get each of the three bottom seams laid down nice and flat, except for this one area on the port side:
Don't know why I couldn't get that section of bottom skin to cooperate. Thinking that maybe it had something to do with the way the clecos were advanced in various directions, I removed most of the clecos forward of the middle frame hoop and started over. Employing various strategies (including a full-on cleco assault) I was able to get the skin to lie down (lay down? I think I missed that day in English class) a little better, but not much:
Having done all I could do it was time to start riveting. That took a long time too, since I don't yet have a pneumatic pop-rivet puller to use. Generally started in the center and worked my way out, repositioning the freed-up clecos as I went. Once the bottom rivets were in the "bump" went down some, but I can still just get my fingernail under the edge. The other 300 inches of seams came out nice and tight, but that little bump, well, I guess I'll just live with it. Hopefully whoever looks underneath the plane to scrutinize the rivet lines won't notice. I can just hear it now: "Have a little trouble with the edge-breaker, didja?" A bit blurry, but here's the same area after riveting the four bottom skins together:
And here's the rest of the bottom with rivets:
Now we turn the whole thing over to add the left and right side skins. It's not hard 'cause it doesn't weigh much. Riveting the bottom freed up a lot of clecos, which is good 'cause we're gonna need 'em. Here it is turned right side up:
Before we put on the side skins, however, we fasten in the aft bulkhead that we spent so much time on. That required a lot of manual persuasion and I'm sad to say that there were more than a few scratches added to the skins where the aft bulkhead went in. The aluminum alloy skins have a super-thin layer of pure aluminum that serves to protect the alloy from corrosion, so you want to avoid deep scratches if you can. Here's the aft bulkhead installed on the bottom skins:
The vertical stabilizer and horizontal stabilator will attach here. The skid plate protrudes out the bottom just a little bit, about 1/8 inch or so. Once the bulkhead is fastened in the side skins are cleco'd on:
There's just three more skins left, and once they're on it will be really hard to get back in there. So it was time to peel off the blue protective film while I still had easy access. Other items that are easy to do now (and don't require any clecos) are: Route the wires for the AST servo (electric trim tab), add static-air ports and tubing for the avionics, and run kite strings for fishing the rudder and stabilator control cables through later.


.JPG)


No comments:
Post a Comment