- riveting together two more spar hinge assemblies (Page 14-02). (Picture below.)
- attached the hinge assemblies to the aft wing spars and doublers (Page 14-03). (The doublers have a round tip that slips into the fuselage); and
- attached the curved tip angles to the rear spars.
 In Section 15 we prep the wing ribs. As noted in my last blog post, Page 15-02, Step 1, says to "Flute and straighten all of the W-1208 Nose Rib flanges." Page 15-03, Step 1, also has us "Flute and straighten all of the W-1210 Main Rib flanges." That's 26 main ribs and 28 nose ribs. Contrary to my previous post (starring my lovely and talented daughter
 54 wing ribs is a lot of ribs to flute so it took a while - several weeks in fact. It just wasn't a task to get excited over because it's monotonous, tedious, and there's nothing to show for it but an imperceptibly flatter stack of ribs. The only advice I would pass along to other wing builders is that shallower flutes between each rivet hole (i.e. each rib flange tab) seems to work better than deeper (but fewer) flutes in getting a straight line of rivet holes in the rib flanges. The natural arch in the factory rib is fairly uniformly distributed, so the flutes should be too, right?
For some reason nearly all of the center lightening holes had a bit of roughness from the factory stamping process and it seemed like something that should be smoothier. Has to do with the initiation and propagation of stress cracks in sheet metal. Or something like that. Since there are three lightening holes per rib there were 162 holes to sand smooth. I initially tried using the swivel deburring tool but it didn't seem to work well on holes that big, so I ended up using several sheets of high quality (cloth backing) sand paper to smooth the rough edges. Your results may vary.
After fluting and sanding there was still more prep work left. 13 (of 14) left nose ribs get their aft flanges cut off (Page 15-02, Step 2). Could have used the band saw but for the most part metal snips worked better. Then more sanding along the cut line. Then all of the right main ribs had their flanges removed (Page 15-03, Step 3), along with half of the left main ribs (Step 2). Five left nose ribs have the forward-most upper & lower flanges snipped off (to make room to attach the foward stub spar) and for those I used regular office scissors since the metal snips were too awkward to use there. And yes, you can cut aircraft alumninum with office scissors (if your fingers are strong enough). Weird, huh?
Finally nutplates were added here and there to attach the stall warning switch and electrical plug. Two main ribs get doublers attached and the flaperon hinge brackets are match drilled to be riveted on later. Then there was priming to do. I lost count of the number of five-dollar rattle cans I went through as I put multiple coats of self-etching primer on each rib for uniform coverage, while simultaneously wondering whether I'm wasting time and money trying to protect al-clad aluminum, which is already corrosion resistant, especially in a low-humidity area like Sacramento. Eventually (as in, it took me a couple months) the ribs were prepped and ready to rivet. Once again neighbor Ken helped me take the left main spar down from an overhead rack to the work table so I could start turning it into an airplane wing. They're light enough for one person, but as Dave G noted, in tight quarters the main spars can be 15½ feet of mayhem if you're not careful. The picture below shows the four stacks of wing ribs ready to go: L & R main ribs and L & R nose ribs. Interestingly, it's mostly right ribs that go on the left wing, and left ribs that go on the right wing. More Van's humor, that.
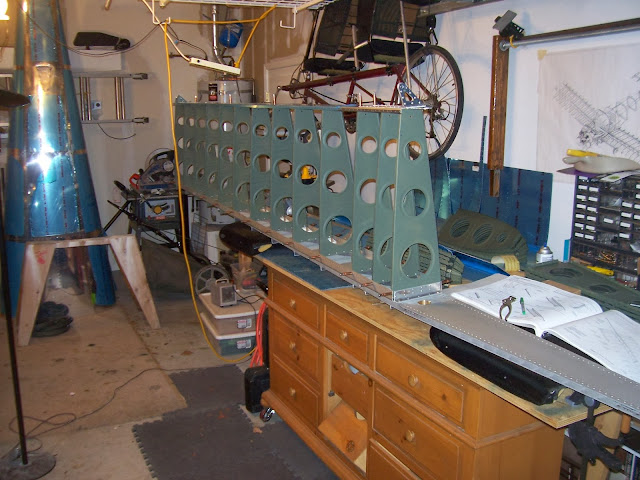
 With the ribs now prepped I could finally start attaching main ribs to the left main wing spars - visible progress just in time for the arrival of holiday guests.
Merry Christmas everyone!


No comments:
Post a Comment