Natomas Follies

VSB - very slow build

Thursday, October 25, 2012

Skinning the Stabilator

So moving along last week I drilled holes in the piano hinges for the trim tab.  The drill press I borrowed worked well for that task.  Also finally got around to throwing out the piano hinge that I screwed up on September 12.  The light soft aluminum hinges cut and drill easily and, as you can see, bends easily as well.  Thought about turning it into a Christmas tree ornament but the CFO quickly put the kibosh on that idea upon seeing it sitting on the kitchen counter.
After prepping the hinges it's time to attach the main stabilator skins to the skeleton with clecos and start riveting.  The right skin I did myself but for the left one the assembly was too awkward and bulky so I needed help nudging the forward ribs and skin holes to line up.  Fortunately relatives came over and volunteered to help ("volunteered" - sounds much nicer than "drafted" doesn't it?).

We always start riveting at the leading edge and work our way back.
After a while the rivet tool was getting less and less of a grip on the rivet post and started requiring 7, 8 or 9 squeezes to "pop" the rivet.  Driven to exasperation I disassembled it, sprayed out the barrel with automotive prep clean followed by WD-40, reassembled it and tried it on a rivet.  Better, but it still wasn't getting good bite.  Then I put a washer on the interchangeable nose of the tool and after that it worked perfectly:  squeeze, squeeze, squeeze, POP!

530 pop rivets later the stabilator skins are on!  Keeping things in perspective, however, that's just a dent in the box of 10,000 rivets shipped to me by Vans to build the airplane.

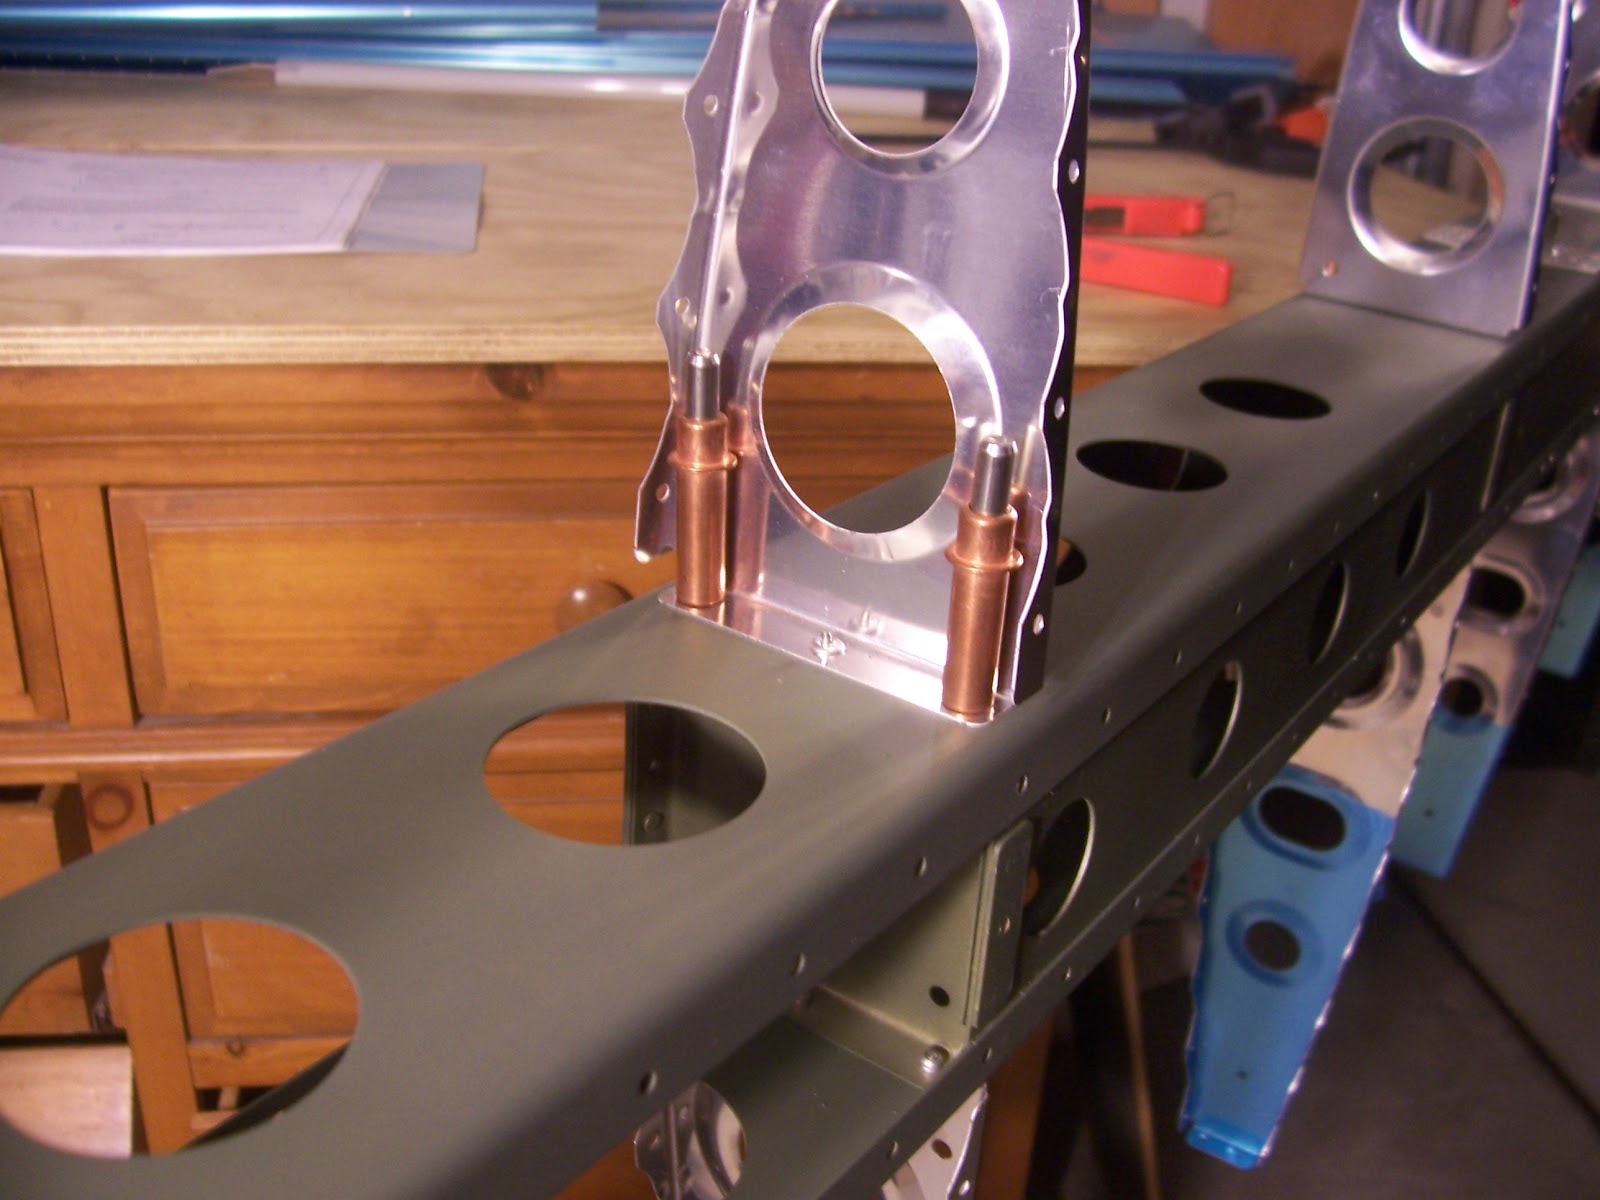
The next step calls for attaching the aft trim tab hinge to the back of the stabilator.  Before riveting I checked to see if the trim tabs would fit by installing the trim tabs and hinge pin.  It was a tight fit but seemed okay so I cleco'd the hinge onto the back of the stabilator with the trim tab still on.  Here's a picture of the control horns where the two trim tab halves meet:

After the test fit the trim tab was removed and the hinge(s) and splice plate were riveted on.  By this point I had "popped" 670 rivets and my hand was sore from all the squeezing on the rivet tool so I took a break from popping any more rivets.

I did, however, cleco on the aft stabilator ribs (4) and skins to see how they would look.  I was concerned with how I would ever get the trim tab hinge pins in once the aft ribs and skins were on.  Reading ahead shows that the hinge pins are sharpened on one end and inserted from the middle by bending it.  The other end is bent into an "L" shape and safety wired in place.  Inserting the hinge pin promises to be a PITA difficult and I wondered why we don't just put the AST trim tab on now while there's still easy access to the hinge pin holes.  Upon further reflection it occurred to me that the inboard aft skin ribs need to be bent over a little to get the rivet tool on the rivets and that would not be possible with the trim tab(s) on.

Monday, October 22, 2012

Stabilator Hinge Brackets

Page 9-7  has us bolting in the stabilator hinge brackets and hinge stops (that's what the 21/32" pieces of alumninum tube were for).  The page has a nice figure that explains everything.  What it does not have, however, is anything reminding you to use a torque wrench.  Apparently you're just supposed to know that you need it.  Indeed, way back on page 5-10 (which also covers topics like canopy protection and scratch removal) it does say to use a torque-wrench on all the bolts.  I suppose I must have read it back in June sometime, but somehow didn't stick in the right brain cell.  At any rate, I've accidently sheared off my share of bolts (including one for the water pump on my truck that bolts into the engine block) so not wanting to break anything or strip any threads I bolted in the brackets and hinge stops to what I felt was a safe place somewhere between "snug" and "tight".  Then, as I cleaned up to go inside and enjoy a nice cold beverage, I remembered reading something about using a torque wrench on these bolts.  Sure enough a quick check of DaveG's 11/24/09 Schmetterling Aviation blog entry showed that a torque wrench was needed at this point, and that the specified torque is 20-25 inch-lbs.

Since page 9-7 of the manual said nothing about using a torque wrench, the revelation caught me by surprise, but okay, no problem.  The guy at work who loaned me the precision calipers, drill press, band saw and all the other airplane building tools I've been using also loaned me his torque wrench.  First thing I wanted to do is to measure how tightly I had torqued the bolts with a regular socket wrench.  Next thing was to re-torque them to spec.  Turns out I had wayyy over-torqued the bolts - about 45 in-lbs or so.  So I backed 'em off to 15 or so and then re-torqued to about 25 as required for AN3 nuts and bolts.  25 inch-lbs is just five pounds of pressure on the end of a five-inch wrench, and really is not very tight at all.
Page 5-10 also says to torque the nut, not the bolt, whenever possible.  If the figure on page 9-7 had the bolts for the hinge stops pointed inward, instead of outward, it would be possible to get a torque wrench on the nut to tighten it.  As it is you have to torque-wrench the bolt head and not the nut because the inboard ribs are in the way.  I just have to trust that Van's has a good reason (yet to be revealed) for pointing the hinge stop bolts in the outboard, rather than inboard, direction.

Wednesday, October 17, 2012

Skeleton complete

Just in time for Halloween, the stabilator skeleton is done.  (Not a very good costume though.  More strange than scary!)

Tuesday, October 16, 2012

Stabilator spar box and ribs

Page 9-2 has us separating hinge brackets, spacers, and doubler plates; final drilling holes, countersinking, and deburring.  With the right tool, deburring holes is fairly routine by now and goes quickly.

Didn't have any issues (I hope) following the instructions on pages 9-3 (prepping the spar box) and 9-4 (installing the counterbalance arm bracket); don't have any interesting stories to tell (Chinese curse: may your day be interesting); didn't take any pictures; and I'm behind on my blogging so I'm skipping past those pages.  I just hope that I got the nut plates for the upper and lower stabilator horns riveted in the right place.  If the horns don't bolt in just right, it would be bad.  Really bad.

Page 9-5 has us cut a short piece of aluminum tube into four shorter pieces of aluminum tube.   They'll be used as hinge stops.

It's actually quite a PITA challenge because the prescribed length is 21/32nds of an inch, plus 1/32nd or minus 0/32.  When was the last time you saw a ruler marked in 32nds of an inch?  Since metal is much easier to remove than to add back on the strategy is to cut slightly too long and nibble it ever so delicately down to a target of 43/64ths of an inch (0.672") with a Scotch brite wheel.  At 43/64ths the tolerance range is +/- 1/64th (+/- .016").  The only way to measure that is with precision calipers, which, lucky for me, was included with all the other tools loaned to me by a guy at work.
It was difficult making the ends perfectly square, but the final tube lengths came out to 0.666 +/- .004, 0.674" +/- .003, 0.676 +/- .002, and 0.672 +/- .001.  Two were ground down below spec. (Rats!)  I suspect that's why Van's included two of the tubes in the kit.  They know.

On Page 9-6 Van's suggests that "A great way to form the radius [of the rib tips] is with a fine file." Since there are 8 foward ribs (and, thus, 16 tips to radius), I think they say that to get a laugh, like the instructions to use a metric crescent wrench.  A scotch-brite wheel is wayyy faster and is the one indespensible tool if you want to get the plane done before it's time to move into the old folks home.  Here's the before and after picture:

Attaching the ribs on the spar is encouraging because you know it won't be long 'til the skin goes on, which, in my case, will free up a lot of space on the shop table.  The pop rivets used are fairly dummy proof, but unfortunately the tiny space between the rib and rivet post makes it hard to get a pop rivet tool on the rivet post.

That's what these little wedges are for.  Sometimes you use one, sometimes two.  Sometimes you start with two and then switch to one.  The instructions don't really say.  They help you get the rivet tool on the post, or mandrel, and pull it at an angle till it "pops" (breaks off).  Bending the rib over a little bit helps too.

Speaking of rivet tools, I've been lobbying a coworker to let me "try out" his pneumatic pop-rivet puller for months.  I think I'm finally wearing him down.  Just in time too.  The two stabilator skins use almost 600 pop rivets.  Once he realized that it had a lifetime warranty he seemed a bit less concerned about me borrowing it.  Smart guy.

And now we have a nice rivet in a very hard to get at location.  Whew!  Just 30 more to go...